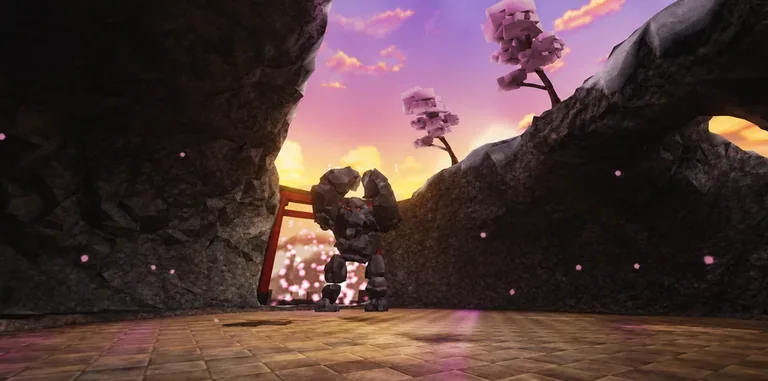
Master the Boss Raid mode in Dungeon Quest Reborn. Discover the drop table for legendary gear, boss rotation mechanics, and tips to climb all 30 tiers efficiently.
Published: Dungeon Quest Reborn Wiki Editorial Team
Table of Contents
Understanding Boss Raid Mechanics in Dungeon Quest Reborn
Boss Raids in Dungeon Quest Reborn represent a significant departure from standard dungeon crawling. Instead of navigating through waves of mobs and complex layouts, you are dropped directly into a high-intensity arena to face a single, rotating boss. This mode is designed as a "boss-rush" challenge, demanding optimized gear and quick decision-making under the game's 3.5-minute time limit.
The mode features 30 distinct tiers, each increasing in difficulty. The system is designed to reward progression: when you successfully clear a tier, you earn the key required to challenge the next level. However, the stakes are high—if you fail to defeat the boss within the time limit, you lose the key for that specific tier. Importantly, the game protects your progress by ensuring that keys for higher tiers you have already unlocked remain safe, allowing you to focus on overcoming the current hurdle without fear of losing your overall standing.
Boss Rotation and Encounter Pool
Success in this mode requires familiarity with the boss pool. Because the boss rotates, you cannot rely on a single strategy. The encounter pool includes:
Fusion Goliath
Robot Gladiator
Gilded Dragon
Golden Golem
Earth Golem
Ancient Stone Guardian
These bosses vary in attack patterns and health pools, meaning your gear choice—specifically your weapon type—should ideally be adaptable. Since you only have 3.5 minutes to clear the encounter, DPS (Damage Per Second) is the most critical metric. Players often switch between different legendary weapons depending on the elemental weakness or resistance of the current boss.
Legendary Drops and Best-in-Slot Gear
The primary incentive for grinding these 30 tiers is the exclusive loot table. According to community reports, the Boss Raid mode is one of the most efficient ways to farm top-tier equipment. The following legendary items are highly sought after by players aiming for end-game optimization:
Top-Tier Legendary Drops
Dual Bioforged Drills: Excellent for high-speed sustained damage.
Dual Godforged Blades: A preferred choice for players focusing on critical hit builds.
Twisted Wood Greatsword: Offers significant base damage for heavy hitters.
Hextech Overloaded Staff: A staple for mage builds focusing on area-of-effect or high magic output.
Godforged Greatstaff: Provides superior scaling for late-game magic users.
Twisted Wood Greatstaff: A solid alternative for players balancing magic damage and durability.
To maximize your chances of these drops, ensure your luck stats are optimized. As noted in the game's official platform title, updates frequently include "2x Luck" events, which are the ideal times to grind these raids.
Strategies for Efficient Clearing
To consistently clear all 30 tiers, you must manage your time effectively. Since the time limit is strict, wasting even 30 seconds on inefficient movement or poor target prioritization can lead to failure.
Prepare Your Loadout: Before entering the portal, inspect your current gear. Ensure your weapons are upgraded to the maximum tier possible.
Analyze the Boss: Identify the boss immediately upon entry. If it is a high-health boss like the Fusion Goliath, prioritize your most damaging gear over defensive items.
Manage Cooldowns: Save your high-impact abilities for the boss's vulnerable phases rather than using them on minor adds that might spawn during the fight.
Practice Movement: Use the arena's space to kite bosses. Many bosses in the raid have telegraphed attacks that can be dodged, preserving your health for the final burn phase.
FAQ: Common Questions About Boss Raids
What happens if I fail a boss raid?
If you fail to defeat the boss within the 3.5-minute time limit, you will lose the key to that specific tier. However, you do not lose progress on higher-tier keys you have already earned.
How many tiers are in the Boss Raid?
There are 30 tiers in total. Each tier provides a unique challenge, and clearing them sequentially is required to unlock the higher-difficulty rewards.
Is there a time limit for each boss?
Yes, every boss encounter in the raid mode is restricted to a 3.5-minute window. Speed is essential to securing your rewards.
Final Tips for Success
The community emphasizes that consistency is key. Many players report that jumping between tiers to "warm up" on easier bosses before attempting the highest tier you have unlocked can help with gear tuning. If you find yourself consistently timing out, check your damage output against the boss's health pool—if you are barely making a dent, you likely need to spend more time in lower-tier dungeons to farm upgrade materials before attempting the Boss Raid again.
Always keep an eye on the official Dungeon Quest Reborn Roblox page for announcements regarding drop rate multipliers. Taking advantage of "2x Drop" events can drastically reduce the amount of time you need to spend farming for specific legendary items.