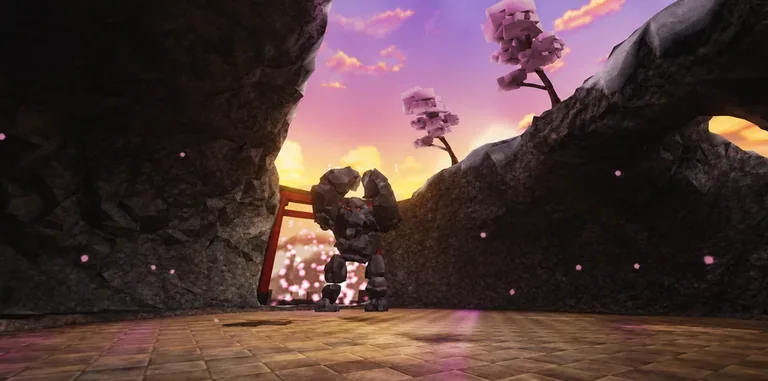
Mastering the Odin's Reincarnation Boss Fight in Dungeon Quest Reborn
Struggling with Odin's Reincarnation in Dungeon Quest Reborn? This guide covers the Northern Lands boss mechanics, survival tips, and rare loot drops to help you farm efficiently.
Published: Dungeon Quest Reborn Wiki Editorial Team
Table of Contents
Understanding the Northern Lands Dungeon
Northern Lands stands out as one of the most challenging endgame environments in Dungeon Quest Reborn. As a level 186+ dungeon, it is designed for players who have already optimized their gear and are ready to tackle higher-tier content. The dungeon features a distinct Norse mythology theme, updated with a darker, nighttime aesthetic and the Aurora Borealis, setting it apart from the original game’s version.
For players aiming to optimize their farming, understanding the structure of the dungeon is vital. It is not just about raw power; it is about recognizing the four distinct boss encounters. While many players focus on the final Odin boss, the fourth encounter—Rødin, or Odin’s Reincarnation—is arguably the most critical for loot hunters. This boss is the primary source for the dungeon’s most coveted Ultimate ability drops.
Identifying Rødin (Odin’s Reincarnation)
In Dungeon Quest Reborn, Rødin is the fourth boss in the Northern Lands sequence. Community reports emphasize that this fight is not a simple "tank and spank" encounter. It requires active participation in mechanics that test both memory and reaction time.
Unlike earlier bosses that might be forgiving of mistakes, Rødin utilizes mechanics that can instantly eliminate players who fail to adapt. The fight is notoriously difficult for uncoordinated groups, often leading to wipes if players do not understand the color-switching and movement patterns.
Mastering the Mechanics of Odin’s Reincarnation
Surviving the encounter with Odin’s Reincarnation requires a deep understanding of its specific attack patterns. Based on community experiences, the fight is broken down into phases where movement and positioning are just as important as your character's stats.
Tip
The Color-Switching Mechanic
The boss periodically shifts between colors (Red, Yellow, Green, White). Players must move to the corresponding safe zones. Beware of the "pump fake," where the boss displays one color but quickly shifts to another. Always wait a split second to ensure the color is stable before committing to a zone.
The Memory and Movement Phases
One of the most challenging aspects of this fight is the memory game combined with projectile attacks. The boss forces players to memorize patterns, such as "Left, Right, Right, Left," while simultaneously avoiding incoming fireballs.
How to Survive Complex Patterns
Prioritize Survival: Do not greed for DPS during the memory phase. If you die, your team loses valuable damage output.
Stay Grouped: Community reports suggest that staying with the pack is safer than trying to dodge individually. If you are unsure of the pattern, follow the players who seem to know the mechanics.
Manage Camera Angles: Keep your camera centered on the largest threat. If the screen becomes too cluttered, you will lose track of the color zones.
Watch for Nukes: The boss uses area-of-effect "nukes" that can wipe out the entire party. These are often telegraphed by specific patterns in the memory phase. If you see the screen fill with projectiles, focus entirely on movement.
Tactical Team Composition
While it is possible to clear this content solo, the difficulty spikes significantly. Most successful runs rely on a balanced party. The presence of a dedicated healer is often the difference between a successful clear and a wipe.
Healer Role
A healer is essential for mitigating the damage from the boss's constant attacks. If you are the healer, focus on positioning yourself behind the damage dealers but within range to cast spells. Your job is to keep the team alive during the color-switching phases when players are most likely to take chip damage.
DPS Role
Damage dealers should focus on "locking in" during the safe windows. Do not waste cooldowns when the boss is invulnerable or transitioning phases. Save your high-damage abilities for when the boss is stationary and the color zones are stable.
Loot and Rewards
The primary incentive for tackling the Northern Lands and enduring the Rødin fight is the potential for high-tier loot. This dungeon is a major endgame target precisely because of the Ultimate weapon drops associated with this specific boss.
Item Name
Rarity
Primary User
Hofund
Ultimate
Warrior / Mage
Mjolnir
Legendary
Warrior
Gungnir
Legendary
Mage
Warning
Manage Your Expectations
Community reports consistently state that the drop rates for these rare items are well below 1%. Do not expect to receive these items on your first run. Treat Northern Lands as a long-term farming project rather than a quick way to gear up.
Frequently Asked Questions
Can I solo the Odin’s Reincarnation fight?
Yes, it is possible, but it requires near-perfect execution. Solo players must maintain absolute focus because there is no one else to soak up damage or revive the team. If you are struggling, it is often more efficient to drop the difficulty level until you master the patterns.
Why do I keep dying instantly during the fight?
You are likely missing the color-match mechanic or failing to dodge the boss's "nuke" attacks. The encounter includes one-shot mechanics if you are standing in the wrong zone when the boss shifts. Always watch for the "pump fake" color switches.
Is there a specific level requirement?
While you may be able to enter at lower levels, the community standard for Northern Lands is level 186+. Attempting this dungeon under-leveled will significantly increase the difficulty of survival and reduce your farming efficiency.
How does this compare to other endgame dungeons?
Northern Lands is unique because of its specific Ultimate drops like Hofund. Other dungeons, such as the Abyssal Void, offer different rewards like the Voidspire or Abyssal Veil. Farm the dungeon that corresponds to the specific gear your build requires.
Final Farming Strategy
To farm Northern Lands efficiently, consistency is your best metric. Do not focus on clear speed until you can complete the run without deaths. Start a "run log" where you track your completions, the difficulties used, and the rewards obtained. This helps you identify if your build is actually progressing or if you are simply getting lucky on one-off runs.
If you find that your team is consistently wiping at the boss, reassess your strategy. Are you dying to the nukes, or are you running out of time? If it is the former, focus on movement training. If it is the latter, you may need to upgrade your gear or optimize your skill rotation to maximize DPS during the short windows when the boss is vulnerable. Remember, in Dungeon Quest Reborn, patience and pattern recognition are just as powerful as high-stat equipment.