Complete Rodin Guide: How to Conquer the Northern Lands Boss in Dungeon Quest Reborn
Master the Rodin boss fight in Dungeon Quest Reborn with our expert guide. Learn essential dodging strategies, phase timing, and survival tips to clear this Northern Lands challenge.
Published: Dungeon Quest Reborn Wiki Editorial Team
Video Guide
FULL Rodin Guide | Dungeon Quest RebornTable of Contents
Mastering the Rodin Boss Fight
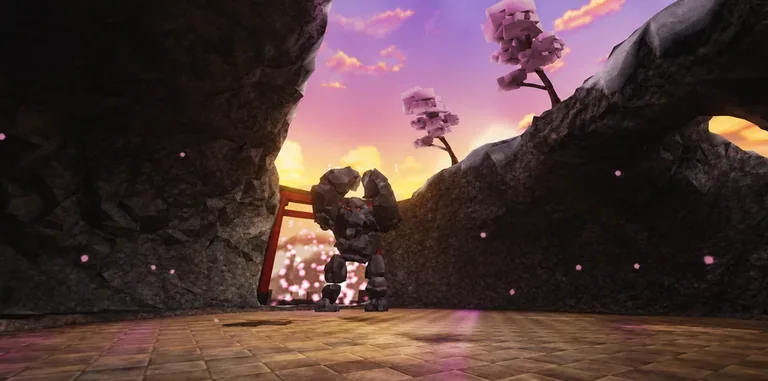
Rodin serves as the primary boss for the Northern Lands dungeon in Dungeon Quest Reborn, representing one of the most mechanically demanding encounters for high-level players. To succeed, you must move beyond raw stats and focus on precise spatial awareness and ability timing. This guide breaks down the fight patterns based on community-tested strategies to help you solo or group-clear this challenge efficiently.
Essential Preparation and Loadouts
Before entering the Northern Lands, ensure your gear is optimized for the encounter. According to current meta-standards, the Valhalla armor sets—specifically the Valhalla Mage, Warrior, and Guardian sets—are the most effective choices for this dungeon.
Tip
While high-end gear like the Gungnir or Mjolnir legendaries provides a significant damage boost, your survival in the Rodin fight depends more on your ability to react to his 4 core abilities than your raw DPS.
When attempting this solo, your timing must be perfect. If you are struggling with damage output, ensure you are utilizing your speed boosts to maximize uptime during the boss's vulnerable windows.
Core Mechanics and Combat Strategy
The Rodin fight is defined by repetitive but punishing patterns. The most common mistake players make is miscalculating their hitbox position. Community reports indicate that even a tiny fraction of your character model remaining outside a safe zone can result in a lost life.
Center Positioning: As soon as the fight begins, move to the center of the arena. This provides the best vantage point to observe which side of the floor the lasers will cover next.
Speed Boost Management: Save your speed boost for when Rodin attempts a "rage bait." If he lures you to one side, use the boost to quickly reposition to the opposite safe zone.
Laser Avoidance: Stay observant of the floor lighting. When the lasers activate, do not hesitate; commit to your movement immediately.
NASA Rockets: Be prepared for the rocket phase. This requires precise movement to weave through the projectiles while maintaining your position within the designated safe circles.
Handling Boss Aggression and Baiting
Rodin is notorious for his "rage bait" tactics. He will often telegraph an attack to force you into a specific corner, only to switch the danger zone at the last second.
Warning
Never commit to a corner until you are certain the attack pattern has fully materialized. "Locking in" your focus during the latter half of the fight is crucial, as the rhythm becomes more erratic.
If you find yourself being consistently caught, practice the "center-to-edge" movement. By standing in the center, you reduce the distance required to reach any safe zone, giving you a wider margin of error to dodge incoming spells.
Understanding the Northern Lands Progression
Rodin is the culmination of the Northern Lands dungeon, which also features the Midgardian Champion and the bonus boss, Odin Reincarnation. If you are farming for the latest Ultimates like Laevattein or Hofund, you will need to clear these encounters consistently.
Clear the Northern Warrior and Northern Mage mobs before reaching the boss room.
Ensure your party composition includes a mix of Warrior and Mage sets for balanced DPS and sustainability.
Keep an eye on the 11-minute timer; efficiency in the mob rooms is just as important as boss mechanics.
FAQ: Frequently Asked Questions
Is it possible to solo Rodin?
Yes, soloing Rodin is entirely possible, but it requires mastery of his attack cycles. Focus on your movement timing and prioritize survival over constant attacking.
How many lives do I have for the bonus boss?
Unlike the standard Rodin fight, the bonus boss, Odin Reincarnation, is significantly more difficult and limits you to three lives to complete the encounter.
What is the best strategy for the laser phases?
Always stay near the center of the arena. This allows you to quickly react to the floor coverage indicators and move to the opposite side of the room as soon as the danger is telegraphed.