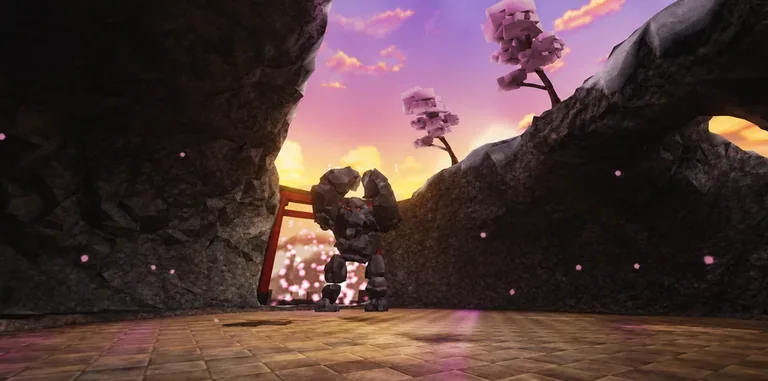
Dungeon Quest Reborn Pumpkin King Hardcore Solo Guide
Master the Pumpkin King hardcore solo run in Dungeon Quest Reborn with optimized builds, attack telegraph breakdowns, and safe kiting strategies.
Published: Dungeon Quest Reborn Wiki Editorial Team
Table of Contents
Beating the Pumpkin King in Hardcore Solo
Clearing the Pumpkin King on Hardcore difficulty as a solo adventurer represents one of the steepest execution checks in Dungeon Quest Reborn on Roblox. Created by Delta Quarters OG, this dungeon crawler experience demands immaculate spatial awareness, precise cooldown management, and an unforgiving respect for enemy attack telegraphs. In Hardcore mode, incoming damage scales aggressively, turning standard boss swipes into lethal one-shot threats while revives are disabled.
Soloing removes the safety net of teammate aggro-swapping and group resurrection. Every projectile, vine trap, and shockwave focuses solely on your character. To claim victory, you must shift your mindset from high-risk DPS face-tanking to calculated, reactive kiting. You will win this encounter by reading wind-up animations early, respecting arena boundaries, and punishing boss recovery windows rather than trying to brute-force damage phases.
Solo Hardcore runs require a fine balance between raw burst damage and survivability. While team compositions can rely on dedicated tanks or healers, an individual player must handle crowd control, sustain, and single-target elimination concurrently.
Investing entirely in pure damage attributes (such as 100% Spell Power or Physical Power) creates a high-stakes scenario where a single mistimed dash ends the entire run. Conversely, over-investing in Stamina and Health leads to prolonged battles where stamina resources drain, increasing the cumulative risk of mechanical errors. Community reports indicate that maintaining an 80/20 or 75/25 split between primary damage and defensive health attributes yields the most consistent clear rates.
Build Archetype
Primary Stat Focus
Key Utility Spell
Strengths in Hardcore Solo
Main Vulnerability
Kite Mage
Spell Power / Stamina
Blink / Teleport Dash
Outstanding damage uptime from safe range; effortless add clearing.
High animation lock on heavy cast spells; weak baseline physical armor.
Agile Warrior
Physical Power / Health
Whirlwind / Leap Slam
High passive defense; instant gap closers; reliable stagger triggers.
Must commit to melee range during dangerous boss shockwave recoveries.
Hybrid Paladin
Health / Physical Power
Holy Radiance / Shield Bash
Generous margin for error; passive self-sustain reduces potion dependency.
Lower single-target DPS prolongs the fight, increasing enrage risks.
Recommended Solo Loadouts
Choosing the right equipment loadout dictates how effectively you manage boss spacing and minion waves. For solo Hardcore, your skill bar must include at least one displacement skill to escape corner traps, one rapid-cast single-target ability, and one wide-area clear ability.
Long-Range Mage Loadout
Focuses on consistent projectile damage while maintaining maximum perimeter distance.
Primary Weapon: High-tier Staff or Wand scaling with maximum Spell Power and Cooldown Reduction.
Offensive Spell 1: Rapid Firebolt or Arcane Missiles for chip damage during active boss movement.
Offensive Spell 2: Meteor Strike or Blizzard for preemptive clearance of minion spawn clusters.
Mobility Spell: Instant Dash or Phase Shift to cleanly cross ground-based vine hazards.
Mobile Striker Warrior Loadout
Capitalizes on quick burst windows immediately following the Pumpkin King's heavy overhead swings.
Primary Weapon: Dual Blades or Greatsword with elevated Critical Strike Chance and attack speed.
Offensive Skill 1: Heavy Cleave or Piercing Thrust to deliver quick damage bursts during recovery frames.
Crowd Control: War Cry or Ground Stomp to interrupt and dispatch exploding pumpkin minions.
Mobility Skill: Tactical Roll or Dash with low cooldown to dive out of circular telegraph zones.
Pumpkin King Attack Telegraphs and Mechanics
Surviving the Pumpkin King requires identifying each attack's visual tell well before damage frames activate. The boss operates on a predictable priority queue, alternating between heavy single-target strikes, arena area denial, and minion summoning cycles.
[Boss Wind-up] ---> [Visual Tell] ----------> [Telegraph Marker] ---> [Lethal Impact]
Raised Club         Orange Ground Rune         Expanding Circle        One-Shot Slam
Head Tilt           Mouth Glows Red            Directional Cone        Fire Breath
Staff Raised        Arena Edge Glows           Perimeter Vines         Root & Damage
1. Overhead Gourd Smash
Visual Tell: The Pumpkin King raises his weapon high with both hands while his carved eyes flare orange.
Telegraph Marker: A wide circular red rune expands outward from his feet, covering roughly 25 studs.
Handling: Do not dash immediately upon seeing the wind-up. Wait until the circle finishes expanding, then dash perpendicular to the boss. Lingering shockwaves persist for roughly half a second after impact; crossing back prematurely will deal lethal damage.
2. Rolling Pumpkin Bombs
Visual Tell: The boss crouches slightly and sweeps his off-hand along the arena floor, scattering three to five carved gourds.
Telegraph Marker: Thin linear tracks showing the trajectory of each rolling projectile.
Handling: These gourds bounce off arena boundary walls and explode upon player contact or after four seconds. Stay centered between trajectory lines and maintain camera distance to monitor wall bounces.
3. Briar Patch Entanglement
Visual Tell: The Pumpkin King strikes his staff into the soil, causing green-orange roots to pulse across the ground.
Telegraph Marker: Irregular vine patches sprout across designated floor sections, slowing movement speed by 60% and dealing continuous tick damage.
Handling: Instantly rotate toward the outer stone ring of the arena. Never attempt to trade damage while standing inside active briar patches; the movement speed penalty prevents you from dodging subsequent smashes.
4. Minion Spawning Phase (Carved Thralls)
Visual Tell: At roughly 70% and 35% health thresholds, the boss briefly becomes invulnerable, raising his lantern to summon swarms of exploding minions.
Handling: Prioritize these adds immediately. Thralls possess low health pools but charge directly at the player to trigger self-destruct blasts that can bypass standard armor mitigations.
Warning
Never hug arena boundary corners during the Minion Spawning Phase. Thralls can easily body-block your character against walls, trapping you in unavoidable explosion chains that instantly end your Hardcore attempt.
Step-by-Step Solo Combat Execution
Executing a successful run requires strict adherence to positional discipline throughout each health phase. Player experience shared across community showcases—including dedicated no-hit clears—demonstrates that victory relies entirely on circular kiting along the arena's perimeter.
Initiate at Maximum Engagement Range: Enter the arena and trigger the boss cutscene. Immediately cast your mobility ability to establish positioning along the outer boundary wall, forcing the Pumpkin King to chase in a predictable straight vector.
Bait the First Overhead Smash: Stop moving along the perimeter to bait the boss into his heavy ground strike. As soon as the red circle locks into place, dash laterally along the outer circle to clear the radius.
Unload Your Primary Burst Rotation: The instant the boss's weapon impacts the turf, you have a safe two-second recovery window. Cast your heaviest single-target spells or execute a hit-and-run melee combo, then immediately disengage before he returns to neutral stance.
Reposition and Clear Minion Portals: When the boss transitions to the 70% threshold, halt all damage on the Pumpkin King. Kite in wide circular loops to funnel incoming Thralls into a clustered line, then cast your AoE ability to eliminate them in a single blast.
Manage the Enrage Phase (Sub-30% Health): The Pumpkin King attacks 25% faster during this phase, and briar patches cover larger portions of the central arena. Restrict your movement strictly to the outer clear track, baiting attacks and whittling his remaining health down exclusively during confirmed recovery animations.
Community-Proven Kiting and Survival Techniques
High-level players rely on subtle positional mechanics to trivialize the encounter's lethality. Community reports and video breakdowns from top dungeon runners highlight several core execution habits that differentiate successful solo clears from failed runs:
Buffer Your Mobility Cooldowns: Never expend your dash or blink skill for offensive gap closing. In Hardcore solo play, your mobility skill is exclusively an emergency escape tool reserved for breaking free from tracking projectiles or sudden briar roots.
Camera Elevation and Angle: Tilt your camera upward at a steep top-down angle. The Pumpkin King is visually massive and can obscure floor indicators for trailing pumpkin bombs if your camera remains at standard shoulder height.
Baiting Boss Animations at Mid-Range: If you kite too far away, the boss frequently defaults to rapid projectile rolls that are erratic and difficult to predict. Maintaining a consistent mid-range distance keeps his AI biased toward using the telegraphed Overhead Smash, which offers the safest punishment windows.
Tip
Keep your primary audio turned up during the fight. The Pumpkin King features distinct audio cues—such as a hollow, echoing laugh before rolling bombs and an earthen crunch right before vine eruptions—which alert you to impending mechanics faster than visual indicators alone.
Pre-Run Preparation Checklist
Before committing your character to the boss portal on Hardcore difficulty, run through these essential checks to minimize avoidable deaths:
Gear Durability & Upgrades: Confirm your primary weapon and armor pieces are upgraded to the recommended tier for your target bracket.
Potion Hotbar Setup: Bind high-tier instant health and stamina potions to accessible keybinds; do not rely on clicking inventory slots mid-combat.
Network Latency Check: Hardcore telegraphs leave minimal margin for error; avoid entering the run if server ping fluctuates above 120ms.
Skill Bar Verification: Ensure your skill loadout contains an instant movement skill alongside your primary single-target and AoE abilities.
Settings Calibration: Lower unnecessary particle effects in your graphics options to keep ground telegraph rings completely visible amid spell effects.
Common Fatal Mistakes and How to Avoid Them
Solo players most often fail this encounter not due to poor gear, but because of avoidable behavioral mistakes during combat transitions.
Greedy Attack Commitment ---> Extended Cast Animation Lock ---> Unavoidable Ground Slam ---> Run Terminated
Over-Committing to Attack Animations
The leading cause of solo Hardcore failure is attempting to finish an extended spell cast or melee combo after the boss has begun winding up an attack. If an ability locks your character in place for more than 0.75 seconds, cancel the cast or hold the skill until the next recovery window opens. Survival always takes precedence over DPS speed.
Panic Rolling Into Arena Hazards
When startled by a sudden attack telegraph, players often double-tap dodge keys without checking their landing trajectory. In the Pumpkin King fight, rolling backward frequently lands you inside lingering vine patches or directly into trailing rolling gourds. Train yourself to dash diagonally forward-lateral, past the boss's flank, where the floor is consistently clear of hazard zones.
Neglecting Minion Cleanup
Leaving even two Thralls active while trying to burn down the boss's final 15% health pool is an extremely common blunder. These minions inflict heavy stagger upon explosion, freezing your character just long enough for the Pumpkin King to connect with a lethal follow-up slam. Treat all adds as top-priority targets the moment they spawn.
Frequently Asked Questions
Can you face-tank the Pumpkin King's Overhead Smash with a pure Guardian tank build?
While an ultra-defensive Guardian build with maximum health scaling can occasionally survive an unmitigated slam on Normal or Insane difficulties, Hardcore mode scaling makes relying on tanking impractical. The smash deals massive base damage coupled with lingering shockwave ticks that easily overwhelm defensive shields. Evasion and positional avoidance remain mandatory regardless of archetype.
What should I do if my mobility skill is on cooldown during a ground slam?
Immediately sprint outward at a 45-degree angle away from the boss's dominant arm rather than running straight back. The telegraph hitbox expands radially from the impact point, meaning moving diagonally across the outer edge requires less total distance to exit the danger zone before impact frames land.
Does the Pumpkin King's health scale down for solo runs in Dungeon Quest Reborn?
Boss total health pools scale dynamically based on party size upon entering the dungeon chamber. A solo run grants the Pumpkin King significantly reduced total hit points compared to a full four-player party. However, his baseline damage output, attack frequency, and telegraph radii remain completely unnerfed.
Is melee viable for solo Hardcore, or is ranged magic mandatory?
Melee clears are entirely viable and often yield faster clear times due to high physical burst multipliers. However, melee execution demands tighter reaction timing and strict discipline to hit-and-run tactics. If you are learning the encounter mechanics, a ranged Mage setup provides a far more forgiving learning curve for maintaining spatial control.